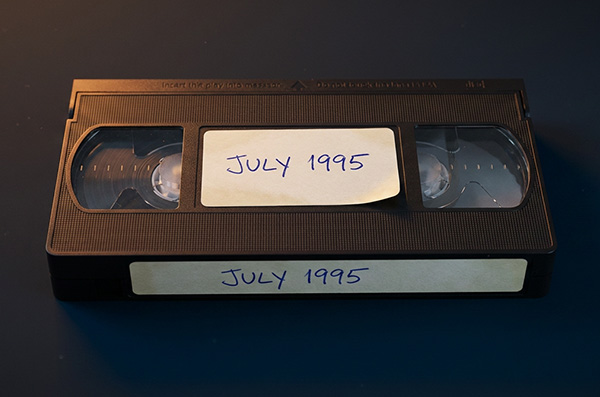
There are three practical ways to convert VHS to digital: do it yourself with a VCR and a video capture device, use a mail-in or retail box service, or send your tapes to a professional studio. Which one is right depends less on the gadget you buy and more on the condition of your tapes and whether what's on them is the only record of something that happened once and won't again.
Most guides on this topic stop at "buy a capture device and go." This one goes further, because that advice hides the part that actually matters. Converting a tape isn't just pressing play and hitting record on a computer. It's a chain of careful steps, and the quality of your digitized files, and what you can do with them, depends on every step. We digitize tape at a professional level, and rather than sell you on that, we're going to show you exactly what happens along the way, so you can make an informed decision instead of a blind one. By the end, you'll understand your own tapes better than most people who convert them for a living.
What actually happens when you convert a videotape
Here's the mental model to carry through this guide. Your video isn't a file sitting on the tape waiting to be copied. It's a fragile analog signal, physically painted onto magnetic particles, that has to be read by a machine, carried down a cable, and translated into digital numbers. At each of those three stages, quality can be preserved or quietly thrown away. Nobody gets to skip the chain. The only question is how carefully each link is handled.
So we'll follow the signal in order: the tape, the machine that reads it, the cable that carries it, and the conversion that translates it. Then we'll talk honestly about doing it yourself versus handing it off.
It starts with the tape, not the gadget

Before any device enters the picture, the real variable is the physical condition of the tape, and this is where most DIY conversions fail before they begin.
Magnetic tape ages. The binder that holds the magnetic particles to the plastic backing slowly breaks down, and older tapes can develop what's known as sticky-shed, where the coating absorbs moisture, gets gummy, and sheds as it plays. A tape in that state can squeal, jam, or leave its own picture behind on the heads. Tapes stored in garages, attics, and basements also grow mold, which spreads across the reel and contaminates whatever plays it next.
Here's the part that raises the stakes: a degraded tape gives you essentially one clean pass. Every play wears it a little, and a fragile tape run through the kind of old VCR that's been sitting in a closet can shed the very oxide that holds the picture, permanently. There's no undo. The footage doesn't get "a bit worse." It can be gone. This is why professionals assess a tape before playing it, and treat or repair it first if needed, rather than shoving it into a deck to see what happens.
Preservation authorities have long estimated the usable life of a videotape at roughly 10 to 30 years under good storage, and most VHS was recorded decades ago, little of it stored carefully. The clock isn't hypothetical. It's already run down on most of what people are converting today.
The machine matters more than the tape
Once the tape is ready, the machine that reads it does more to determine quality than almost anything else, and it's the part people ignore completely.
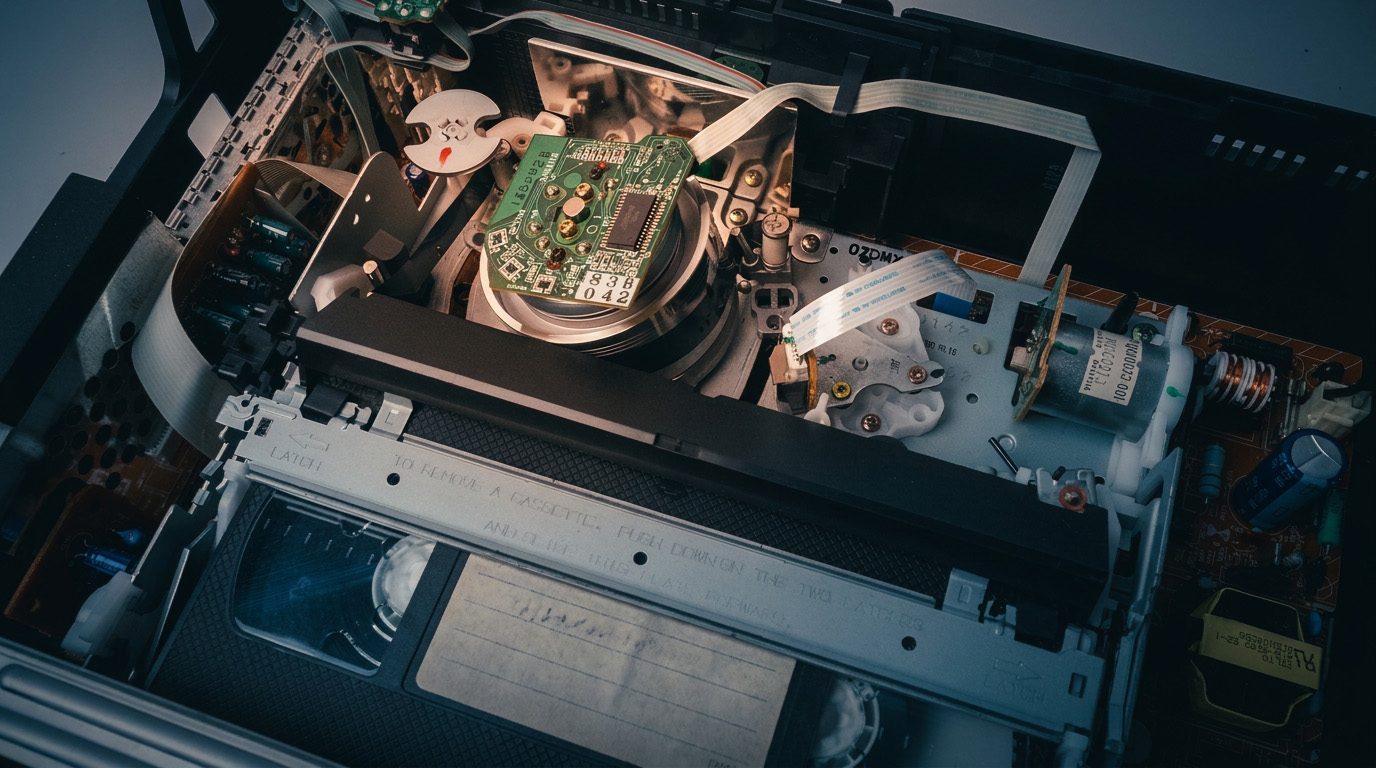
A VCR reads the tape with tiny video heads mounted on a fast-spinning drum, but that's only where it starts. A VCR is a precision machine, full of moving mechanical parts and electronic circuits, and every one of them has to be in good working order to get a clean picture and sound. When they aren't, the results are immediate and ugly: snow, streaks, dropouts, a picture with no color, or no lock at all. A surprising number of "bad tapes" are actually good tapes played on a bad machine.
Three things quietly ruin DIY captures here:
- Dirty or worn heads. A VCR doesn't read with one head: there are video heads for the picture, audio heads for the sound, and a control-track head that keeps the timing in sync. They pick up residue from every tape they play, and a clogged head loses picture. People reach for a drugstore "head cleaning tape," but many of the dry ones are mildly abrasive and wear down the very heads they claim to clean. Proper cleaning means opening up the machine and cleaning the heads and tape path by hand, with the right solvents and materials, applied gently so nothing gets scratched or knocked out of alignment. It's a careful, hands-on job, not a cassette you run blind.
- Tracking and alignment. A tape recorded on one machine doesn't always line up perfectly on another. Without proper tracking, you get noise bands and instability. A misaligned deck can also physically stress the tape.
- Worn moving parts. The rollers and guides that thread the tape and pull it past the heads have to be clean and true. A worn or gummy transport rides the tape wrong, and that's when things go badly: the tape catches, the machine jams, and the tape can crease, get chewed, or snap, sometimes tangled so deep inside the deck it's hard to get out without doing more damage.
The uncomfortable takeaway: a cheap or neglected VCR isn't a neutral tool. It can degrade a good tape and misread it at the same time. The machine is not the boring part. It's half the outcome.
The three things that decide your quality (that nobody mentions)
1. The video output you choose changes the picture
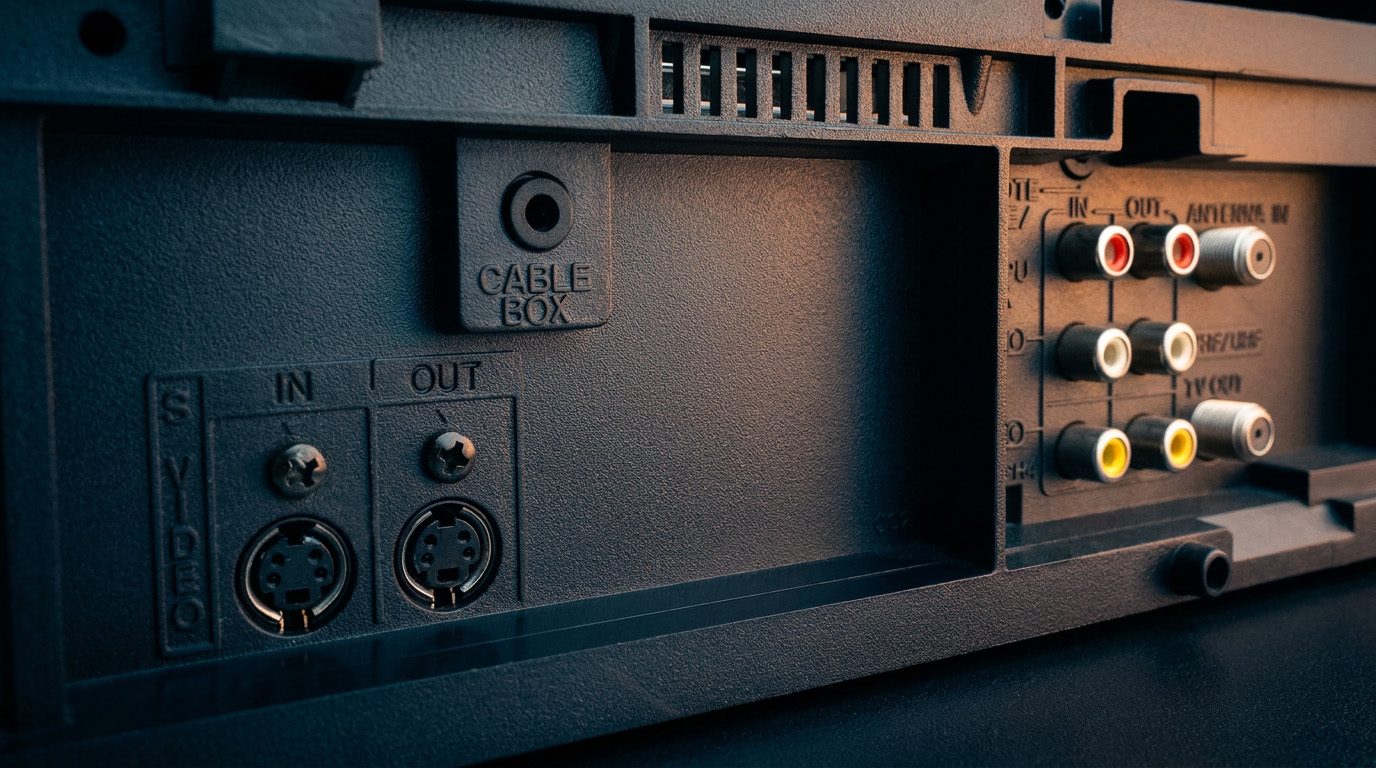
Take the yellow composite output everyone uses and you've already lost quality, and here's the genuinely surprising reason. VHS records brightness and color separately on the tape (engineers call it a color-under system). Composite output forces those two signals back together into a single wire, and then your capture device has to pull them apart again. That combine-and-re-separate step introduces color bleeding and shimmer that was never on the tape.
The S-Video output keeps brightness and color on separate wires the whole way, matching how the tape stored them, so nothing has to be jammed together and torn apart. If your VCR and capture device both offer S-Video, use it. It's the single cheapest quality upgrade in the whole process, and almost nobody knows to make it. (Avoid the RF/coaxial output entirely, it's the lowest-quality of all.)
2. Time-base correction: the thing you've never heard of
This is the concept that most separates a professional capture from a consumer one, and you can go through ten DIY guides without seeing it named once.
A VHS tape is played back by a spinning, mechanical transport, and that mechanism is never perfectly steady. The result is that the timing of the signal wobbles slightly, moment to moment. Your eyes forgive it on an old TV, but a digital capture expects rock-steady timing, and when it doesn't get it, you see the damage: wavy vertical lines, the picture tearing at scene changes, the frame skewing or "breathing," audio drifting out of sync.
The fix is a time-base corrector, or TBC, a stage that steadies the wobbly signal before it's digitized. Think of it like image stabilization for the timing of the video, or like trying to photograph something sitting on a shaking table versus a solid one. Two kinds matter: a line TBC, which smooths the line-by-line jitter, and a frame TBC, which buffers a whole frame and rebuilds clean sync so the capture doesn't drop frames or drift out of audio sync. Professional capture chains include time-base correction as a matter of course. The cheap USB dongles most DIY guides recommend have none of it. They were built to capture from already-stable sources like camcorders and DVD players, not a wobbly tape, which is exactly why so many DIY conversions come out subtly unstable in a way people can feel but can't name.
3. How the signal is captured, and what gets thrown away
The moment of conversion is where a continuous analog wave becomes digital numbers, and a few things there decide how much of your video survives.
The first is the converter itself. Turning an analog signal into digital numbers is precise work done by a real piece of hardware, and not all of it is equal. The cheap chip inside a $20 USB dongle samples the signal coarsely and adds noise of its own. A professional analog-to-digital converter reads the signal more accurately, with cleaner color and less noise, and hands the computer a truer capture of what's actually on the tape. Same tape, same cable, two very different files, decided by the quality of the box doing the translating.

The next is signal levels. The incoming picture has a black point, a white point, and color balance, and if those aren't set correctly going in, you capture crushed shadows, blown-out highlights, or off color, and you're baking those mistakes into the file. Professionals don't guess at this. They read the incoming signal on professional measurement equipment and set the levels for each tape individually, to a proper reference, before capturing. Consumer setups capture whatever happens to come in.
The last, and this is the big one, is compression. Many cheap devices and box services record with heavy compression applied instantly, in hardware, the moment they capture. Compression works by throwing away picture and sound information to make the file smaller, and once it's discarded at capture, no amount of later editing brings it back. The gap is wider than it sounds: a cheap capture keeps only a small fraction of the information coming off the tape each second, while an archival capture holds many times more. This is the whole reason we talk about a master: a master is a high-quality, lightly compressed capture that keeps as much of the tape as possible, and every viewing copy is made from it. Capture straight to a heavily compressed file and you never had a master to begin with. You had a compromise, permanently.
One more thing worth knowing, because you've probably seen it. Old TVs built the picture from two sets of lines, flashed one right after the other (that's what interlaced means). A modern screen shows the whole frame at once, so if this is handled carelessly in the conversion, anything moving in the shot breaks into jagged, comb-like horizontal lines: the torn, stair-stepped look people recognize the moment they see old video on a new screen. Done right, those two sets of lines are woven back into clean, whole frames (the step is called deinterlacing). It's one more decision the cheap path makes for you without asking.
Now you know what actually decides quality, the part no kit will tell you. Here's the practical process if you want to do it yourself with a VCR, start to finish.
How to convert VHS to digital yourself (with a VCR)
This is the standard DIY route, and it takes three things: a VCR, a capture device, and a computer. If your tapes are in good shape and nothing on them would be a real loss, it's a reasonable one. Here's the honest process, end to end.
- Get a VCR you trust. Test it on a tape you don't care about. Clean, stable playback with real color is the bar. If it eats tape or shows heavy noise, don't feed it anything irreplaceable. A quick trick: play a store-bought studio movie first. It was professionally mastered, so it's a known-good reference. If it looks and sounds right, your setup is working; if even that looks bad, the problem is your equipment, not your tapes.
- Get a video capture device. This is the box that turns the VCR's analog output into a digital signal your computer can record. It plugs into the VCR on one side and a USB port on the other. Look for one with an S-Video input, not only the yellow composite jack, so you can take the better output off the VCR (the next step explains why that matters). Some standalone versions record straight to an SD card or USB drive with a small screen and no computer at all, but note: even those still need a VCR to play the tape. They replace the computer, not the deck.
- Choose the right connection. Use S-Video whenever both your VCR and capture device have it. It keeps color cleaner than the common yellow composite output (the output section above explains why).
- Install the capture software and run a short test. Open the software, then before committing to a full tape, capture a test: play a minute or two, record it, and check the resulting file. Watch it back and confirm the picture is clean and stable and the sound is clear. If the test looks and sounds right, run the whole tape. If not, fix the setup first.
- Capture at the highest quality the device offers. These USB devices record straight to a compressed file, almost always an MP4, at standard-definition VHS resolution (about 720×480). That's the ceiling, so set the software to its best, least-compressed setting to keep as much as possible. Capture happens in real time (a two-hour tape takes two hours), though you can record it in shorter segments if that's easier. What matters is not disturbing a segment while it's actively recording: don't knock the cables, and don't run other demanding programs on the computer, because an interruption mid-capture leaves a permanent glitch that can't be fixed afterward. The file you get is ready to watch and share as-is. Just know it's a compressed copy, not a master, which is fine for casual footage but isn't the archival-grade file a professional capture produces.
- Name your files and back them up in more than one place. Give each file a clear name (what's on it and the date if you know it) so you can actually find things later. And one drive is not a backup: keep at least two copies, ideally one offsite or in the cloud.
That's the full DIY route, and every step of it depends on one thing you might not have: a VCR you can trust with the tape. Here's what to do when you don't.
How to convert VHS to digital without a VCR
If you don't own a VCR, or you'd simply rather not do this yourself, the honest answer is the same: you hand it off. First, one myth worth clearing, because it trips people up. Most devices sold as "VHS to digital converters" that need no computer still require a VCR, because they're only the recording half. Something has to play the tape into them. There's no consumer gadget that gets you around needing a machine to read the tape.
So where to convert your VHS to DVD or a digital file really comes down to two routes, from most convenient to most careful.
Box services (retail drop-off and mail-in). The convenient, high-volume route. You drop tapes at a pharmacy or big-box counter, or fill a prepaid box and mail it in, and weeks later a DVD, files, or a drive comes back. Affordable and popular. The trade-off is the model itself: your tapes are boxed up, shipped to a central plant, and run in batches on fixed, standardized settings, with heavy compression and no room to treat your tape as an individual case. That's the opposite of what a fragile or valuable tape needs.
Professional digitization studios. Each tape is assessed and handled individually, cleaned or repaired as needed, and captured on a properly calibrated, time-base-corrected chain at master quality. It costs more, and it exists precisely for footage where the quality and the safe handling of the tape actually matter.
Remember that nothing can add quality that isn't on the tape. Every route only captures what's already there. The difference between them is entirely how faithfully they capture it, and how safely they treat the tape while doing it. For footage you're not worried about losing, the convenient route is fine. For anything that carries real value, the only record of a moment that will never happen again, that difference stops being technical trivia and becomes the whole point.
So, should you do it yourself?
With all that on the table, here's the honest breakdown. Neither answer is wrong. They fit different situations.
The deciding question isn't how many tapes you have or what they'd cost to convert. It's the value of what's on them, and you often won't know for certain until you see it. Some of what's on old tapes is the only record of a moment that happened once. That tape isn't a copy of anything. It's the original, and originals don't get a second chance. Which is why careful handling matters on every tape, not just the ones you're sure about.
How Encanta approaches it
We come at this from an unusual place. Long before "digitizing" was a consumer category, Encanta spent decades handling and protecting the master content that record labels and world-class artists trusted us with. A master is the one source everything else is made from, and a copy is only ever as good as the master behind it. That discipline is what we bring to every tape that reaches us, whatever it holds.
And here's the part most people never hear: right now, that tape is your master. It's the single highest-quality version of that footage in existence, and time is quietly taking it. What we do is build a new master from it, a faithful carrier of everything the tape still holds, so nothing is lost when the original finally goes.
Most services don't build a master at all. They make a compressed copy. This is your one chance to make a master from your master, while the original can still give one.
In practice, our video transfer service means each tape is assessed and handled individually, treated or repaired when it needs it, and captured to master quality on a properly calibrated, time-base-corrected chain, then checked by hand rather than run through in a batch. You get the master file, not a compressed copy, plus viewing versions for easy sharing. If you want to understand who's actually doing the work, see who you're working with. If you're holding something that matters, the first step is simply a straight, no-obligation read on what you have.
Frequently asked questions
How long does it take to convert a VHS tape to digital?
Capture happens in real time, so a two-hour tape takes two hours, plus setup, labeling, and backing up. A large collection done yourself can run into dozens of hours. A professional service absorbs that time for you.
Can you convert VHS to digital without a VCR?
Mostly no, despite the marketing. Most "no computer" converters still need a VCR to play the tape, because they only do the recording. Something has to play the tape, so if you don't have a VCR you can trust with the tape, the practical answer is to hand it to a professional service.
Does the cable I use really matter?
Yes, more than most people expect. VHS stores brightness and color separately, so an S-Video connection preserves them and looks noticeably cleaner than the common yellow composite cable, which forces them together and reintroduces color artifacts.
Will converting VHS to digital improve the picture?
No. Done right, conversion faithfully captures the quality that's already on the tape; it can't add detail that was never there. Done wrong, on cheap gear and the shortcuts covered above, it does the opposite: it degrades the picture, and you end up with less than the tape actually holds. And VHS is already low-resolution by today's HD and 4K standards, so there's no quality to spare. Claims of "HD" or "4K" VHS transfers are upscaling, not recovery. Genuine improvement is a separate, deliberate restoration step, done after a clean capture.
What's the best format to save VHS tapes in?
Save two things: one high-quality master file, and lightweight MP4 (H.264) copies made from it for everyday viewing. But format is the last step, not the fix. The master has to be a proper capture in the first place, because a cheap, heavily compressed capture has already thrown away detail no file format can bring back.
Should I save my tapes on a DVD or a USB flash drive?
Two different things are at play here: the quality of the file, and how safely it's stored. A DVD fails on quality, because DVD video is heavily compressed MPEG-2, a two-hour tape squeezed onto a single 4.7 GB disc at a low data rate, well below master quality. A USB flash drive is different: it can hold a genuine master file at full quality, since the drive itself doesn't limit that. But neither is safe for the long term on its own. Discs deteriorate over the years, and flash storage, whether a flash drive or an SSD, can lose data if it sits unpowered in a drawer. The sound approach is a high-quality master file kept with a proper backup, plus lightweight viewing copies for everyday use, which is the kind of thing media management is for.
Is it worth converting old VHS tapes?
If what's on them carries real value, yes, and sooner rather than later, because both the tapes and the machines that play them are disappearing. For footage you're not worried about losing, it's a fair judgment call.
Holding something worth preserving?
Start with a free collection assessment. Tell us what you have, and we'll give you a straight read on its condition, what's at risk, and what it would take to preserve it at master quality. No cost, no obligation.